Have you ever used mind maps to plan a story or a presentation, and then had to type everything over into another tool to manage content? With MindMup, you can keep your content in a single place, plan great stories using hierarchical breakdowns and visual structure of mind maps, but then simply arrange a nice linear storyboard for your script, presentation or article.
Frictionless idea capture helps you focus on the story in your head, not on the software collecting the ideas. Once you have a nice outline, you can easily share it with colleagues or even collaborate over the Internet to turn it into a great presentation. The content of the presentation stays connected to the map - update a mind map node, or add a new sub-idea to a list, and the storyboard content updates automatically.
When you’re done planning, pull the story out to a vector PDF for printing, or to a Powerpoint presentation scene deck to polish visuals in almost any presentation tool.
Getting started
Select View > Sidebar > Show Storyboard to start working with MindMup storyboards. You can also press the S key on your keyboard to open the storyboard. MindMup storyboard is a sidebar that will take up the right half of the window, and allow you to manage a sequence of ideas in addition to a hierarchical mind map. You can hide the storyboard again by selecting View > Sidebar > Close sidebar or by pressing S again.
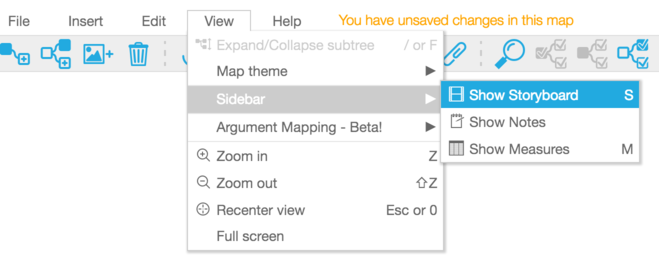
If you’re using a narrow screen, you can switch the storyboard to use the bottom half instead of the right side, to save screen space. Just select View > Sidebar > Vertical Split.
While the storyboard is visible in the sidebar, you will also see the storyboard menu in the main menu bar.
The top toolbar will also show a few new tools, allowing you to easily manipulate the storyboard:
## Add scenes
Drag and drop nodes from the mind map pane to the storyboard pane to add scenes. You can also add the currently selected node by using the keyboard – just press the + key. Multi-select operations also work, so you can for example add all level 3 nodes to the storyboard by pressing 3 and then +.
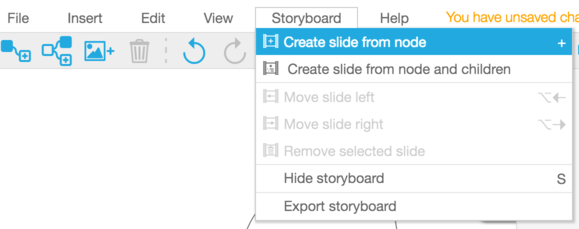
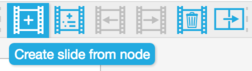
If you prefer using the mouse but don’t like dragging and dropping, you can also select Storyboard > Create Slide from Node from the menu, or the icon with a plus inside the slide on the toolbar.
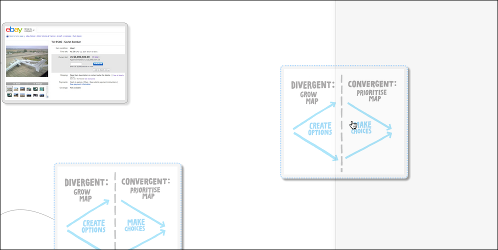
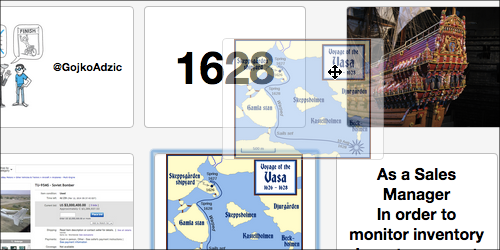
MindMup will automatically select the largest possible font for the scene based on the amount of text in the node. If a node contains an image as well as the text, MindMup will divide the scene into two halfs based on the image node position, and scale the image to take as much space as possible.
Create bullet lists
There are two very simple ways to create bullet lists in scenes:
- Just add lines to node text that start with a dash. Any nodes with multiple lines, some of which start with dashes, will be converted to bullet lists and left-aligned.
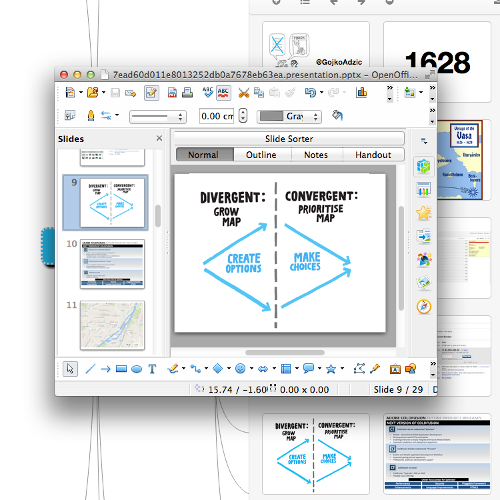
- Use the hierarchical structure of mind maps to describe bullet lists. Select
Storyboard > Create Slide From Node And Childrenbutton to convert a hierarchy into a scene. The currently selected node will become the scene title, and its children will become bullet points.

Plan your story
Drag and drop nodes around the storyboard to reorder them, until you are happy with the sequence of your story.
You can also use the keyboard to manage your storyboard scenes. These shortcuts will work when the storyboard is in focus (just click on any scene to bring it in focus):
- Select a different scene: just use arrow keys to move selection, or click/tap on a different scene
- Move selected scene: use
Ctrland left or right arrow keys to move a scene forwards or backwards in the storyboard. (on OSX, useCmdand arrow keys), or drag and drop a scene somewhere else in the storyboard - Delete selected scene:
Backspace - You can also remove all scenes connected to a node by selecting
Storyboard > Remove selected node
Storyboard scenes are connected to slides, so to edit the scene content, just edit the relevant nodes in the map. If you created a scene from a hierarchy of nodes, then just add or remove children to edit the list.
To make it easier to discover the right node to edit, MindMup storyboards will automatically bring the relevant node in focus when you select a scene by keyboard, tap or click it. You can also open the node editor directly by double-clicking or double-tapping the scene.
Export the storyboard for printing or presenting
Select File > Download as > Storyboard or Storyboard > Export Storyboard from the main menu to export the storyboard into a PDF or Powerpoint.
Scenes will be formatted to 4x3 aspect ratio slides so they will work well with any projector. The PDF export will produce vectors where possible, so the slides can be printed nicely on different size outputs or embedded into other types of content such as booklets. Dashes will be converted to powerpoint bullets so you can edit the slides and style them easily.
Make sure to use high resolution images if you plan to print the slides. Although the images might look scaled on the screen, the full resolution versions will be included in the PDF.
Free users will be able to export storyboards up to 100 KB size. Mindmup Gold users can export storyboards up to 100 MB online, and larger files offline.